MAINTENANCE OF DENTAL EQUIPMENT IN A FEW LINES
Posted by Élodie, on 27/06/2012
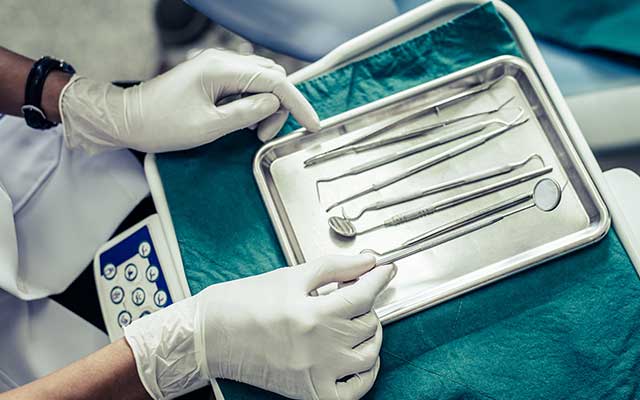
It is true that some people prefer to avoid going to the dentist because they are afraid of the instruments, especially the most famous one: the drill.
This fear for some people is sometimes due to the instruments, more precisely to their maintenance. We quickly associate the succession of patients in a dental office with the lack of cleanliness of the instruments.
How do they chain patients together without transmitting germs that are dangerous for our health? Dental offices and, more generally, all health-related professions must comply with specific hygiene measures to ensure patient safety.
In the case of dentists, all of their equipment, and more specifically the equipment that comes into contact with wounds, tissue fluids or oral cavities, immediately enters into what is called the asepsis chain.
This chain can be summarized in 5 distinct but complementary steps:
Step 1: Decontamination
Decontamination is an operation with a momentary result that eliminates, kills or inhibits microorganisms.
The purpose of decontamination is to:
- Loosen and emulsify organic matter
- Decrease the initial population of microorganisms present on the instruments
- Facilitate subsequent cleaning
- Protect the personnel during the handling of the instruments
- Avoid contamination of the environment
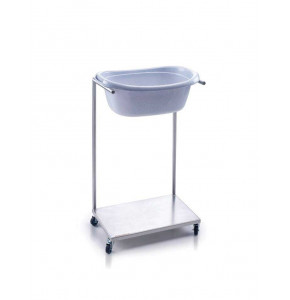
In general, the dentist places his instruments on a tray which is brought to a sterilization area where they are immersed in a decontamination tank containing an antimicrobial product with triple action (disinfectant, cleaner and anticorrosive).
This solution dissolves blood, saliva and dirt. For the solution to work effectively, the instruments must be bathed for an average of 30 minutes. This depends on the antibacterial solution used.
It is important to note that in the case of dentists, the antimicrobial substance is very important. It must comply with the regulations in force:
- The product used must be at the recommended concentration.
- The contaminated instrument must be immersed immediately.
- The immersion must be total.
- Articulated instruments are placed in an open position.
- If the instruments are heavily soiled, the solution must be renewed.
- After each bath, the dip tanks are cleaned and dried.
- The temperature of the bath should not exceed 30°C: higher temperatures fix the proteins.
- The instruments must never be directly immersed in water or in a poorly studied detergent which accelerates the corrosion phenomena and is not at all effective.
- The solution must be compatible with the metals of the instruments
- The concentration of the solution must not be increased.
- The load must not be enriched with dirt
A certain distance must be maintained between instruments with different metal components.
Step 2: Cleaning
After the short soaking session, the instruments are rinsed very quickly with running water for about 5 minutes. The purpose of this operation is to remove organic or mineral matter from the objects. There are three main types of cleaning:
Ultrasonic cleaning: the soiled particles will be eliminated at the temperature of 40-45 ° for 3 minutes. This method seems to be the most effective and safe, because it reduces the risk of aerosol or splash projections, as well as that of injuries that may be caused by the handling of sharp instruments. It also reduces the contact time with contaminated surfaces.
Cleaning with a washing machine: this is actually a thermo-disinfection. This machine generally looks like a dishwasher or a washing machine. It depends on the model chosen.
Manual cleaning: probably the most effective method for multi-part instruments.
Step 3: Rinsing and drying
This step consists of rinsing the instruments under running water in order to eliminate all traces of solvent that could be toxic for the patient and harm the longevity of the instruments. The instruments are dried with cloth towels.
This procedure is respected because it increases the life of the instruments. By doing this, the dentist prevents the instruments from rusting and becoming unusable.
Step 4: Wrapping/packaging
To protect the instruments permanently and keep them sterile, they are packaged in bags closed with adhesive tape.
This type of packaging is ideal for autoclaved instruments. The packaging is done in perforated metal boxes for the autoclave, completely closed.
It is imperative, whatever the type of packaging or wrapping, that the shadow effect is respected, i.e. the instruments should not be too close together so that the heat can reach all sides of the accessory during the sterilization cycle.
Step 5: Sterilization
Sterilization is the irreversible cessation of all microbial and viral multiplication capacity. It is the elimination of all microbial and viral life. The respect of these 5 key steps ensures the safety of the patients who need dental care.
 Francais
 Cart
Cart Quote
Quote